Heat Press Temperature and Time Guide for DTF and Sublimation
Printable tables of heat press temperature, time and pressure for DTF transfers on five fabrics and sublimation on eleven materials, with troubleshooting for faded, ghosted, peeling and scorched prints.
In this guide 7 sections
Getting the heat press temperature and time right is the difference between a print that lasts and one that fades, peels or leaves a scorch mark. The trouble is that every material behaves differently: cotton wants more heat than polyester, a crystal needs far longer than a mug, and glass is printed the opposite way round to a tile.
This guide brings together Print Right’s recommended settings for DTF transfers and for sublimation, in two tables you can print and stick next to your machine. After the tables you will find a troubleshooting section for four common problems: faded prints, ghosting, peeling and scorching.
One rule before you start: these are starting points, not guarantees. Heat presses vary, blanks vary, and room conditions vary. Always test on a spare piece before you press a customer’s order.
Three things that matter as much as the numbers
1. Your display may not match the real platen temperature
The number on the controller is what the sensor reads, which is not always what the whole heating plate delivers. If your results are inconsistent, check the platen surface with an infrared thermometer or heat-sensitive temperature strips in the centre and near each corner. Cooler corners are a common reason why one edge of a print looks weaker than the rest.
2. Pressure is part of the setting
The tables below list pressure as light, medium, moderate or high. Pressure is felt rather than measured on most manual presses. As a guide, light pressure closes with little effort, moderate needs a firm push, and high pressure needs real effort to lock. Adjust the pressure knob with the blank in place, because a thick hoodie and a thin t-shirt need different knob settings to reach the same pressure.
3. Moisture and preparation
Fabric holds moisture, especially in a humid climate like ours. A quick pre-press for a few seconds drives out moisture and flattens creases, so the transfer or ink meets a flat, dry surface. For hard blanks, wipe away dust and fingerprints and remove any protective film before pressing.
DTF heat press temperature and time by fabric
These settings come from Print Right’s Help Center for DTF transfers. DTF transfers are always cool peel: let the film cool completely before you peel it away.
| Fabric | Temperature | Time | Pressure and notes | Peel |
|---|---|---|---|---|
| Cotton | 160 °C | 25 s | Firm pressure; cool completely before peeling | Cool |
| Cotton–polyester blend | 150 °C | 20 s | Teflon sheet recommended | Cool |
| Polyester | 140 °C | 15 s | Lower heat avoids scorch and shine | Cool |
| Nylon | 135 °C | 15 s | Pre-press; cover with parchment | Cool |
| Leather | 130 °C | 12 s | Light to medium pressure | Cool |
If you are unsure what a garment is made of, check the care label. For blends, use the blend setting rather than the cotton setting, because the polyester content is more likely to shine or scorch at higher heat.
A simple DTF pressing routine
- Set the temperature and time from the table, and let the press reach temperature.
- Pre-press the garment briefly to remove moisture and creases.
- Position the transfer, film side up, using the garment seams to centre it.
- Cover with a Teflon sheet or parchment where the table recommends it.
- Press for the listed time at the listed pressure.
- Remove the garment and let the film cool completely.
- Peel the film slowly and at a low angle. If any part lifts with the film, lay it back down and press again.
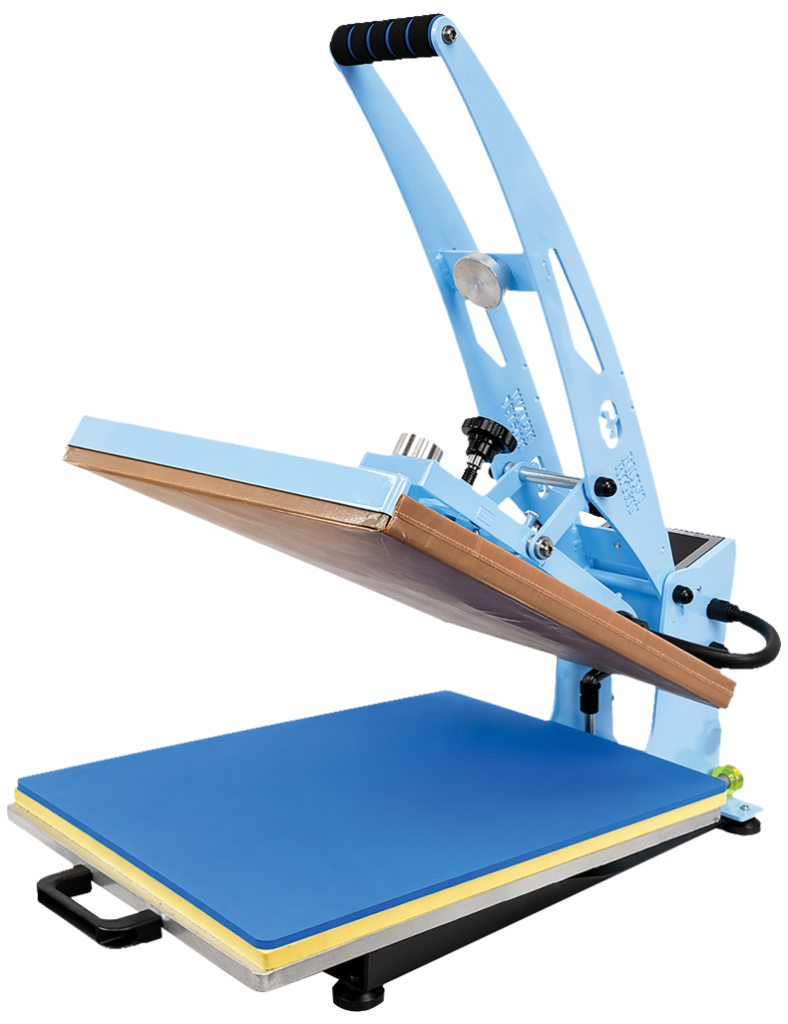
Our flat-bed heat press machines include models from A4 size up to 16″ × 24″ (A2), and the custom t-shirt starter package is built around a 15″ × 15″ or larger press. If your files are not ready yet, read the nine artwork mistakes that ruin DTF prints first.
Sublimation temperature and time by material
Sublimation works on polyester fabric and on hard blanks with a polymer coating, and it looks best on white or light surfaces. The table lists which way to print the image, how much pressure to use, and Print Right’s settings for a 3D press, a flat-bed press or a mug press where we give them.
| Material | Print orientation | Pressure | 3D press | Flat-bed press | Mug press |
|---|---|---|---|---|---|
| Ceramic mug | Mirror | Moderate | 180 °C, 8 min | – | 180 °C, 3 min |
| Ceramic plate | Mirror | Moderate | 180 °C, 4–5 min | – | – |
| Ceramic tile | Mirror | Moderate | 180 °C, 6 min | 180 °C, 200–240 s | – |
| Glass | Straight | Moderate | 180 °C, 6 min | 180 °C, 150–180 s | – |
| Crystal | Straight | Moderate | 180 °C, 10–13 min | 180 °C, 200–300 s | – |
| Crystal plaque | Mirror | Moderate | 180 °C, 4–5 min | 160 °C, 200–300 s | – |
| T-shirt, light (sublimation-coated or polyester) | Mirror | High | – | 180 °C, 30 s | – |
| T-shirt dark / vinyl / DTF | Mirror or straight | High | – | 160 °C, 25 s | – |
| Metal | Mirror | High | 180 °C, 3.5–4 min | 180 °C, 60 s | – |
| MDF wood | Mirror | High | 180 °C, 4–5 min | 160 °C, 150 s | – |
| Granite rock | Mirror | Moderate | 180 °C, 8 min | 180 °C, 200–240 s | – |
Mirror or straight: why it changes
Most sublimation prints are mirrored, because the paper is placed face down and the image flips as it transfers. Glass and crystal blanks marked “straight” are the exception in this table: they are pressed and then viewed through the glass, so the image already reads correctly without flipping. If you are not sure, print a small test on plain paper, hold it in position against the blank and look at it from the side the customer will see.
Which press for which job
- Mug press: the quickest route for mugs, at 3 minutes in the table above. See our mug heat press machines.
- 3D vacuum press: handles mugs, plates, crystals and rocks, with longer times. The ST-3042 3D heat press is one example.
- Flat-bed press: for fabric, tiles, flat glass, metal and MDF, with shorter times for many hard blanks.
If you are planning a gift business around these blanks, our photo mug and personalised gift guide covers the full setup.
Troubleshooting: faded, ghosting, peeling and scorching
| Problem | Common causes | First things to try |
|---|---|---|
| Faded or dull print | Temperature or time too low; too little pressure; wrong material for the method; damp paper or fabric | Check real platen temperature; increase pressure; confirm the blank suits the method; pre-press |
| Ghosting (double or blurred image) | Paper or film moved during pressing or opening; peeling too early | Secure with heat-resistant tape; open the press smoothly; follow the correct peel |
| Peeling or cracking | Low temperature, time or pressure; peeling DTF film while hot; moisture or fabric finishes | Re-press with parchment; cool peel fully; pre-press; test on a spare garment |
| Scorching or shiny marks | Too much heat for the fabric; no cover sheet; press left closed too long | Use the lower setting for blends and polyester; use a Teflon sheet or parchment |
Faded prints
For sublimation, fading usually means the ink did not fully turn to gas and bond. Check that the blank is polyester or properly coated, that you are using sublimation ink and paper, and that the press really is at 180 °C where the table says so. Pale results on cotton-rich t-shirts are a material problem, not a setting problem. Our comparison of DTF and sublimation explains which method suits which fabric. For DTF, a dull or patchy look often points to low pressure or an uneven surface, such as a seam or zip under the print area.
Ghosting
Ghosting happens when the paper shifts slightly while the ink is still transferring. Tape sublimation paper firmly at two or more points with heat-resistant tape, especially on mugs and tiles. Open the press in one steady movement instead of letting it spring up, and do not slide the item out with the paper still loose.
Peeling
If a DTF transfer lifts when you peel the film, stop, lay the film back down and press again for a few seconds with firm pressure. Then let it cool completely. Remember that all DTF settings above are cool peel. For customers, recommend washing garments inside out and avoiding ironing directly on the print.
Scorching
Scorch marks and shiny patches are most likely on polyester and nylon: shine tends to show on dark fabric, and yellowing on white or light fabric. Drop to the fabric-specific setting in the DTF table, use a Teflon sheet or parchment, and never leave a garment under a closed press while you attend to something else.
Keep a pressing log
Every time you test a new blank, write down the material, press, temperature, time, pressure setting and result. After a few weeks you will have settings tuned to your own machine, which is more reliable than any general table. Before you run a new heavy-duty press for long shifts, also read our heat press machine power connection guide.
Frequently asked questions
What temperature should I use for DTF transfers on cotton t-shirts?
Print Right’s Help Center recommends 160 °C for 25 seconds with firm pressure on cotton, then letting the transfer cool completely before peeling. Test on a spare shirt first.
Is DTF hot peel or cool peel?
The DTF settings in this guide are all cool peel. Let the film cool completely before peeling it away, and if part of the design lifts, press it again.
Why is my sublimation mug print faded?
The most common causes are low real temperature, too little time or pressure, a mug without a sublimation coating, or paper that moved. Print Right’s recommended setting for a mug press is 180 °C for 3 minutes.
Do I mirror images for sublimation on glass?
No. In Print Right’s settings, glass and crystal are printed straight, while mugs, tiles, plates, metal, MDF and rock are mirrored. Print a paper test to check before pressing.
Why do my settings not work on my press?
Presses differ, and the display temperature may not match the plate surface. Check the plate with a thermometer or temperature strips, adjust pressure for the blank thickness, and keep a log of what works.
Need help with your settings?
If a print keeps failing, send a photo of the result and your settings on WhatsApp to 077 762 8679, or bring the blank to our showroom at 382 Galle Road, Colombo 06 and we will look at it with you. More answers are in the Print Right Help Center.